How to streamline your event registration process in CiviCRM: In the last two decades, the CiviCRM toolbox has grown relentlessly. SYSTOPIA alone has built and maintained over 60 extensions to solve problems of CiviCRM user worldwide. This series aims to make our work a bit more visible – extension by extension. Maybe the missing software piece you are looking for is already out there?
What does it do?
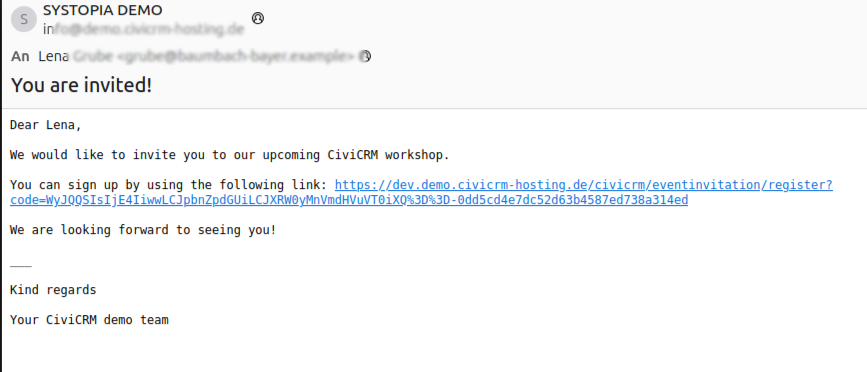
Event Invitation is an extension that allows you to invite contacts in CiviCRM to events using personalized links. Guests are then taken to a personalized, pre-filled feedback form to confirm whether they can attend.
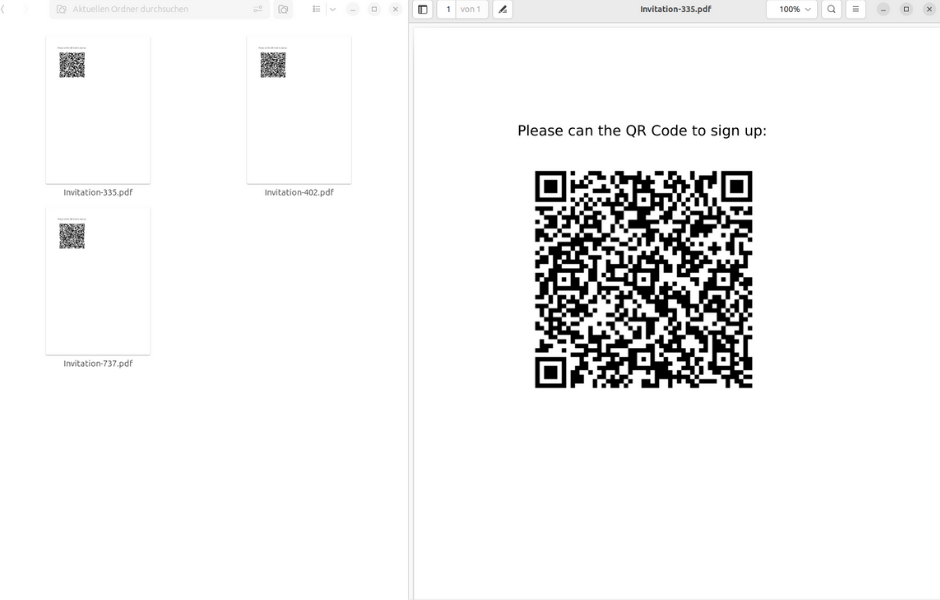
You can invite contacts via email or letter. Both can include a personalized invitation link. If you use a letter, the link can be presented as a QR code.
Who is this extension for?
This extension is a simple yet game changing little tool for all organizations that handle recurring events for a loyal base of constituents.
The key difference between the standard event registration form and an event invitation is the personalized sign-up link:
If a contact is already in your database, why have them re-enter their data every time they attend your awesome events? For your contacts, the personal invitation means significantly less effort to respond and usually leads to better response rates.
Your backend staff benefits from a better overview of who has already been invited to which event and whether a confirmation or rejection has already been received. The pre-filled feedback form also helps keeping your data clean and free from duplicates.
How do you use it?
1. Optional: Configure a Drupal endpoint
This extension can be used with a Drupal endpoint within the CiviRemote framework.
CiviRemote describes a set of tools to display event calendars, information, registration forms, etc. on a remote Drupal site separate from your CiviCRM backend. It can also submit data entered by your constituents back to CiviCRM, while offering additional options for theming, forms and permissions management.
If you are interested in using a remote signup page, please refer to the documentation of CiviRemote, Remote Event and Remote Event Form Editor to set it up.
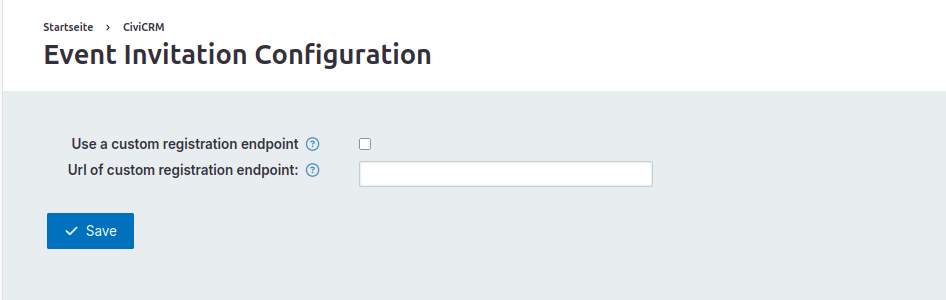
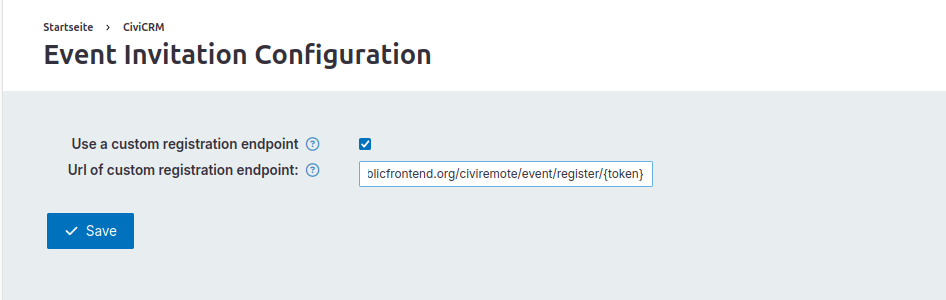
Then, find the extension's settings under → Administer → Administration Console → Event Invitation Configuration (/civicrm/eventinvitation/settings?reset=1) and provide information on the endpoint.
This is optional for the use of the event invitation extension, but it is designed for seamless integration. If you are not using a Drupal endpoint, simply leave these settings blank.
2. Create a Message Template
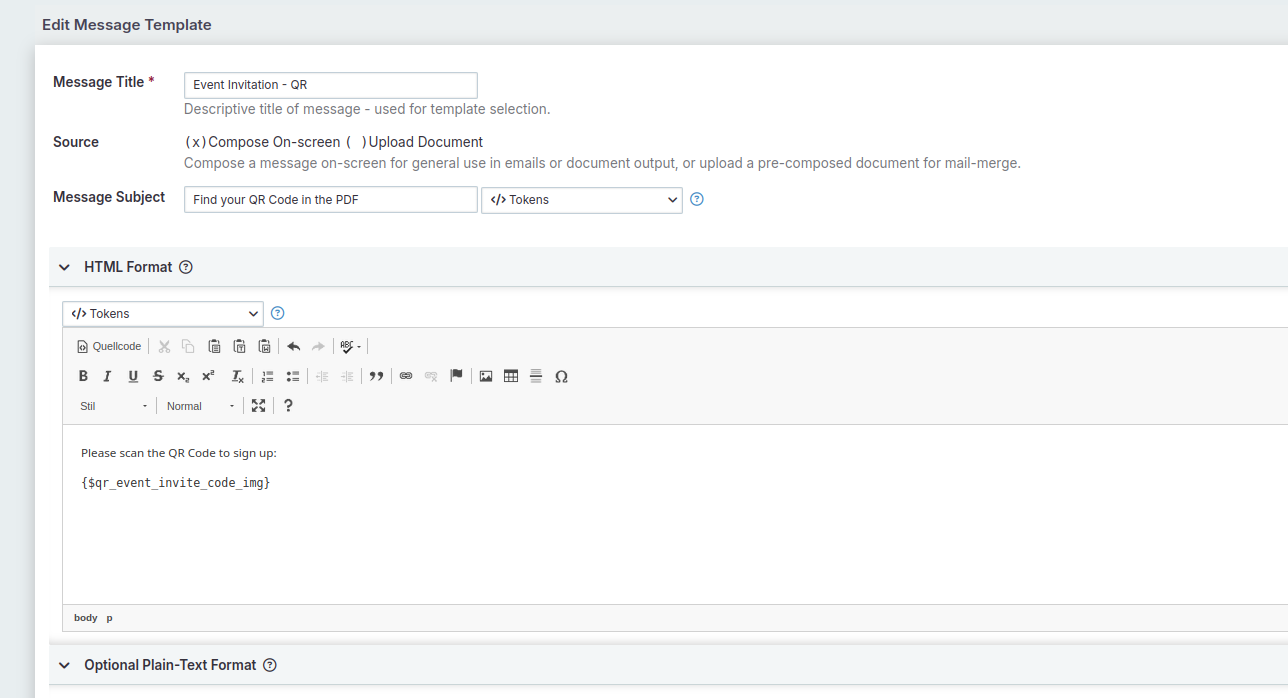
Event Invitation lets you create a personalized sign-up link for each participant and include it in your mailing via Smarty tokens. You can also generate a QR Code to let your guests scan a letter and register with their phone. To start your invitation, create at least one message template (→ Mailings → Message Templates) that contains one of the following Smarty variables:
{$qr_event_invite_code}- generates a unique link for the participant{$qr_event_invite_code_img}- generates a unique link for the participant presented as an QR Code with fixed width{$qr_event_invite_code_data}- generates a unique link for the participant presented as an QR Code that can be html formatted as an image

3. Invite Participants
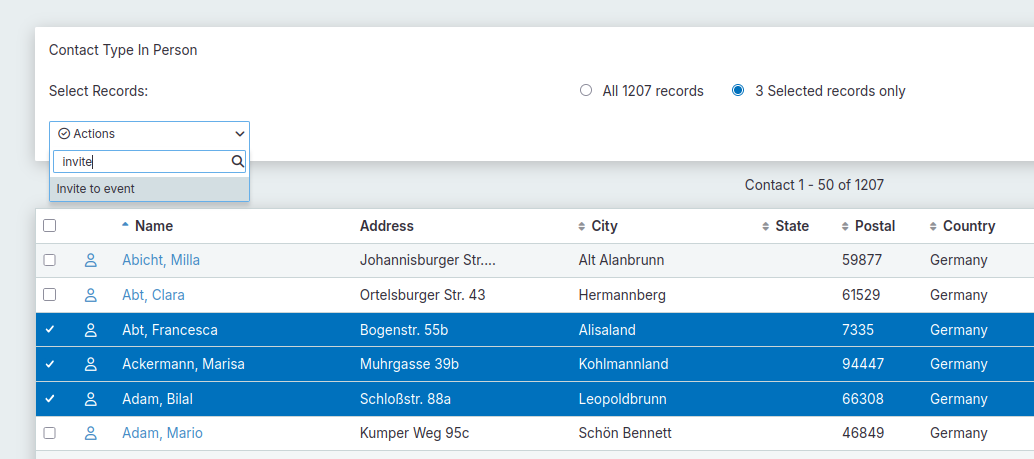
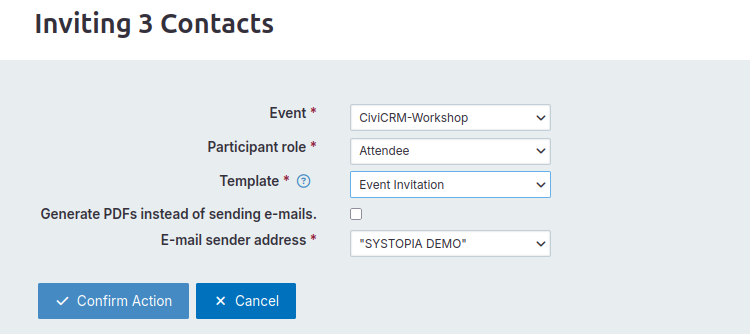
From a contact search result, select any number of contacts and choose "Invite to event" from the action menu. You will be presented with a dialogue that allows you to select:
- the event you are inviting the contacts for
- the message template to use
- the sender address
- the role to be assigned to the participants
- whether you want to send emails or generate PDF-Files
Click “Confirm Action” to invite the selected contacts. Their participation status in relation to the event will be set to "invited".
4. Receive registrations
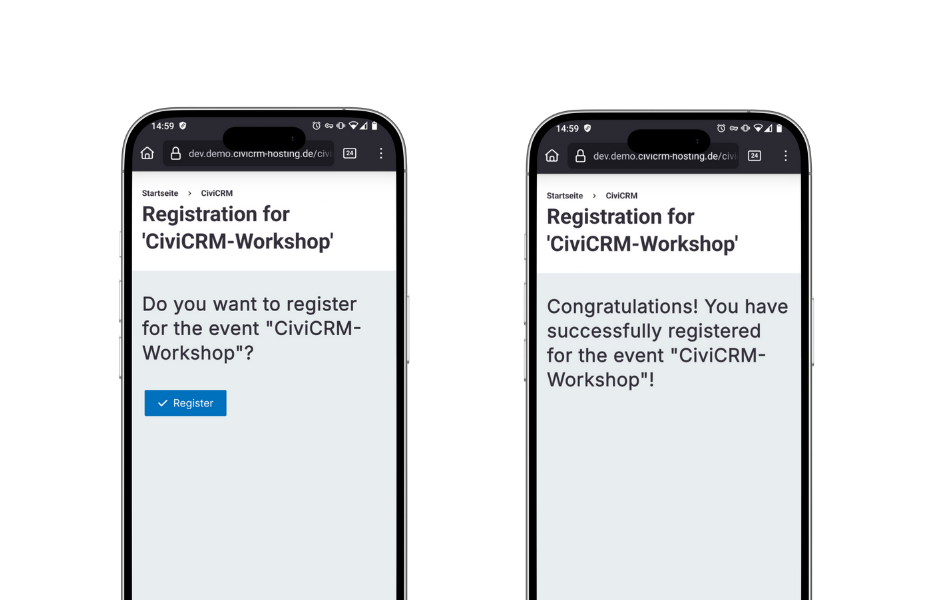
When the invited persons click on this link or scan their QR code, they are taken to a personalized (pre-filled) form. After submitting the form, the corresponding registration status is updated.
Anything else?
If you are aiming at utilizing a truly automated email workflow, please check out the event messages extension. It’s a sweet addition to your events communication tab to define mailing rules based on participants' role, status etc. including the invite tokens mentioned here, as well as personalized document attachments.
You can also check-in participants at your events with another handy extension. But don’t you read ahead, because this will be thoroughly covered in the next Extension of the Month… 😉
And finally: This is free software, and it's hard and often unpaid work to develop and maintain it. If you find it useful, please consider making a financial contribution. You can reach us at info@systopia.de.
Thank you for reading. Feel free to get in touch with us for any questions or feedback.
Links
- Event Invitation in the extensions directory
- Event Invitation on docs.civicrm.org
- Event Invitation on Github