Published
2010-06-19 06:35
Thanks to the good folks at the Party of European Socialists that sponsored the feature, Tech To the People & CiviCrm have made easier to generate name badges and place cards for your events.
If you ever had to export the list of participants, do a mail merge in word, print it 20 times until the margin and the space between each badge is aligned with the one on your paper, you already know that it's going to save you hours. If you ever had a José or a Åsa and screamed because excel decided to replace é or Å by weird symbols, you definitely are going to love it.
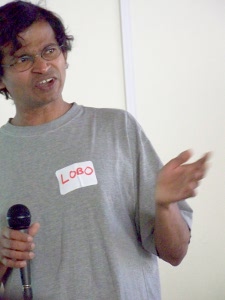 Granted, not as charming as the handmade one Lobo had for civiCon 2010, but in 2 clicks, you can generate a pdf with the name badges for all the participants.
How to use it ?
From the list of participants, you have a new action "print event name badge". Select all the participants you want to print a name badge for, choose the format and voila, you have your pdf, ready to print. You can also print only one badge from the participant record. By default, they are 3 formats: Simple (text only), badge with logo and place setting card. It is shipped with the civicrm logo:
How can I change the logo ?
You can easily change the logo by adding a custom directory for your template, and putting the background image you want to use in templates/CRM/Event/Badge/CRM_Event_Badge_Logo.png for the logo, and in templates/CRM/Event/Badge/CRM_Event_Badge_NameTent.png for the name tent. We had best results using png, and the image is assumed to be 300dpi (to have a proper result when printed)How can I change the logo for one event specifically?
Let's say that you have designed a specific logo for the meeting "General Assembly 2011", event number 42. Simply put your logo under templates/CRM/Event/Badge/42/CRM_Event_Badge_Logo.png and voila, it will use it.How can I change the format and print different information?
You will need to code a little bit to print the data you want in the space you want. You need first to go to the admin interface: http://example.org/civicrm/admin/options/event_badge?group=event_badge&reset=1 And add a new format, with a class name CRM_Event_Badge_{yourname}. You then have to create that class in CRM/Event/Badge/CRM_Event_Badge_{yourname}.php Say that you want to create a new template that has only one badge per page, but that prints it on both side (one of the side has to be upside down). Your class inherits from CRM_Event_Badge, that does most of the work. You simply have to code the function generateLabel, with the layout you want. You might also override the constructor, for instance if you want to set a different page format or a different number of columns and row for your namebadges.
require_once 'CRM/Event/Badge.php';
require_once 'CRM/Utils/Date.php';

class CRM_Event_Badge_W7100 extends CRM_Event_Badge {

  function __construct() {
      parent::__construct();
      $pw=105; $this->ph=148;// A6 105 x 148
      $w=85; $h=60;
      $lMargin = ($pw-$w)/2;
      $tMargin = ($this->ph-$h*2)/2;
      // this is the same parameters as for the labels
      $this->format = array('name' => 'W7100', 'paper-size' => 'A6', 'metric' => 'mm', 'lMargin' =>$lMargin, 'tMargin' => $tMargin, 'NX' => 1, 'NY' => 1, 'SpaceX' => 0, 'SpaceY' => 0,'width' => $w, 'height' => $h, 'font-size' => 12);
      $this->lMarginLogo = 5;
      $this->tMarginName = 30;
      //very useful during the development, it puts a border around the name badges and around most of the blocks of text
      $this->setDebug ();
   }


    public function generateLabel($participant) {
        $this->writeOneSide($participant);
        $this->pdf->StartTransform();
        $this->pdf->Rotate (180, $this->pdf->width/2+$this->pdf->marginLeft, $this->pdf->height+$this->pdf->marginTop);
        $this->writeOneSide($participant);
        $this->pdf->StopTransform();
   }

   public function writeOneSide($participant) {
     $x = $this->pdf->marginLeft;
     $y = $this->ph/2;
     $this->pdf->SetXY($x,$y);
     $this->printBackground (true);

     $this->pdf->SetFontSize(8);
     $this->pdf->MultiCell ($this->pdf->width, 0, $this->event->title ,$this->border,"L",0,1,$x ,$y+$this->pdf->height-6);

     $this->pdf->SetXY($x,$y+$this->pdf->height-5);
     $date = CRM_Utils_Date::customFormat($this->event->start_date, "%e %b");
     $this->pdf->Cell ($this->pdf->width, 0, $date ,$this->border,2,"R");

     $this->pdf->SetFontSize(15);
     $this->pdf->MultiCell ($this->pdf->width,10, $participant['first_name']. " ".$participant['last_name'] ,$this->border,"C",0,1,$x ,$y+$this->tMarginName);
     $this->pdf->SetFontSize(10);
     $this->pdf->MultiCell ($this->pdf->width, 0, $participant['current_employer'] ,$this->border,"C",0,1,$x,$this->pdf->getY()-3);
   }

}
The array $participant contains a lot of fields beside the first and last name, and you might want to print the country of the participant, or have a different layout based on the role (eg the speakers and hosts have a different logo than the volunteers).
Filed under
Comments
Event name badges have been on lots of folks wish-lists for several years. Really great that the Party of European Socialists and Tech to the People stepped up to make this happen!
How can you print multiple badges on CiviCRM? Your instructions are not clear of how to do what.